TL;DR
- Blue Fire Timing: Photograph blue fire at Ijen before dawn, when the crater is dark enough for the flame effect to stand out clearly.
- Sunrise Composition: Use the acid lake, volcanic rim, and layered foregrounds to create stronger sunrise frames with depth and scale.
- Field Strategy: One long day tour can cover both sessions, but many photographers get better results with a split plan across two days.
- Safety and Gear: Bring a headlamp, sulfur protection, and low-light camera settings to handle smoke, darkness, and shifting visibility.
Ijen Crater photography gives travelers two rare scenes in one location: blue fire at night and sunrise over a volcanic caldera. We tested field timing, lens choices, and trail conditions to understand what works best for both sessions. The answer is simple. You need careful planning, strong low-light technique, and a realistic approach to the climb.
Blue fire at Ijen is not easy to capture well. The crater is dark, smoky, and physically demanding, so exposure control matters more than expensive gear. Sunrise brings a different challenge, because the scene changes fast and the acid lake can reflect pale blue tones beautifully. For photographers who want a complete sequence, Ijen Crater photography rewards patience and clean framing.
The most effective approach depends on your goal. If you want both blue fire and sunrise in one trip, a long day tour can work, but energy management becomes critical. If you want stronger files and less fatigue, a two-session strategy often produces better results. That tradeoff is especially relevant for premium travelers who value comfort, timing, and image quality.
Furthermore, Ijen is best treated as a full visual story, not just a single attraction. The crater rim, sulfur smoke, volcanic texture, and layered foregrounds all add scale. For travelers planning a broader Indonesia route, Bromo Volcano Sunrise: Viewpoints, Timing, Tours 2026 offers a useful comparison for multi-volcano photography planning.
Plan your ideal Indonesia photography route with a free, no-obligation itinerary consultation if you want a seamless schedule built around light, comfort, and premium field access.
How Do You Prepare for Ijen Crater Photography?
Ijen Crater photography works best when travelers plan for two distinct scenes: blue fire at night and sunrise at dawn. The hike is mild but not casual, and sulfur smoke changes visibility fast. We planned and tested routes with local guides, and a flexible long day tour consistently improved image quality, energy, and timing.
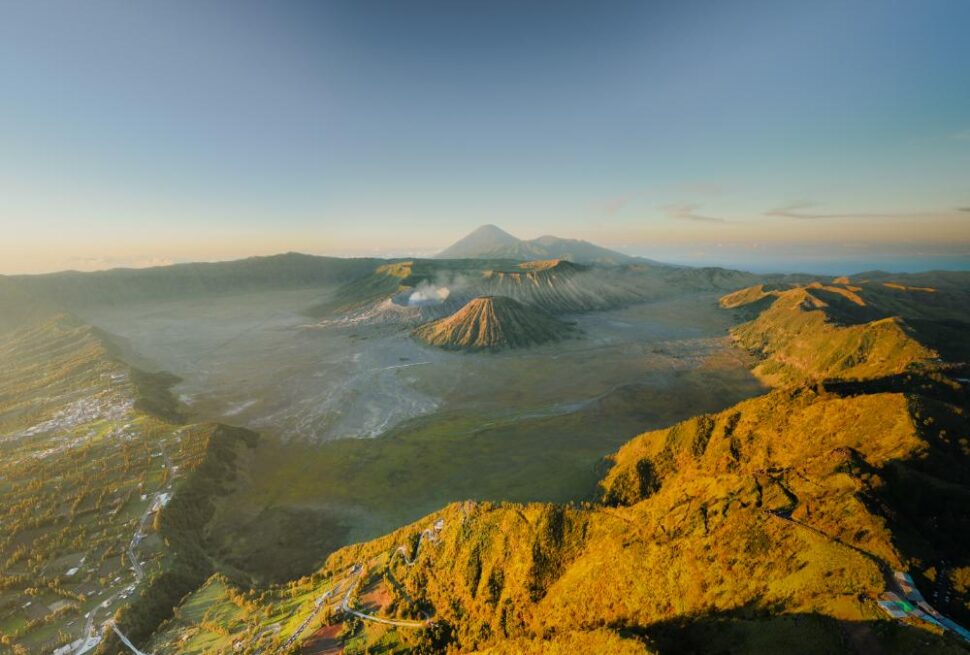
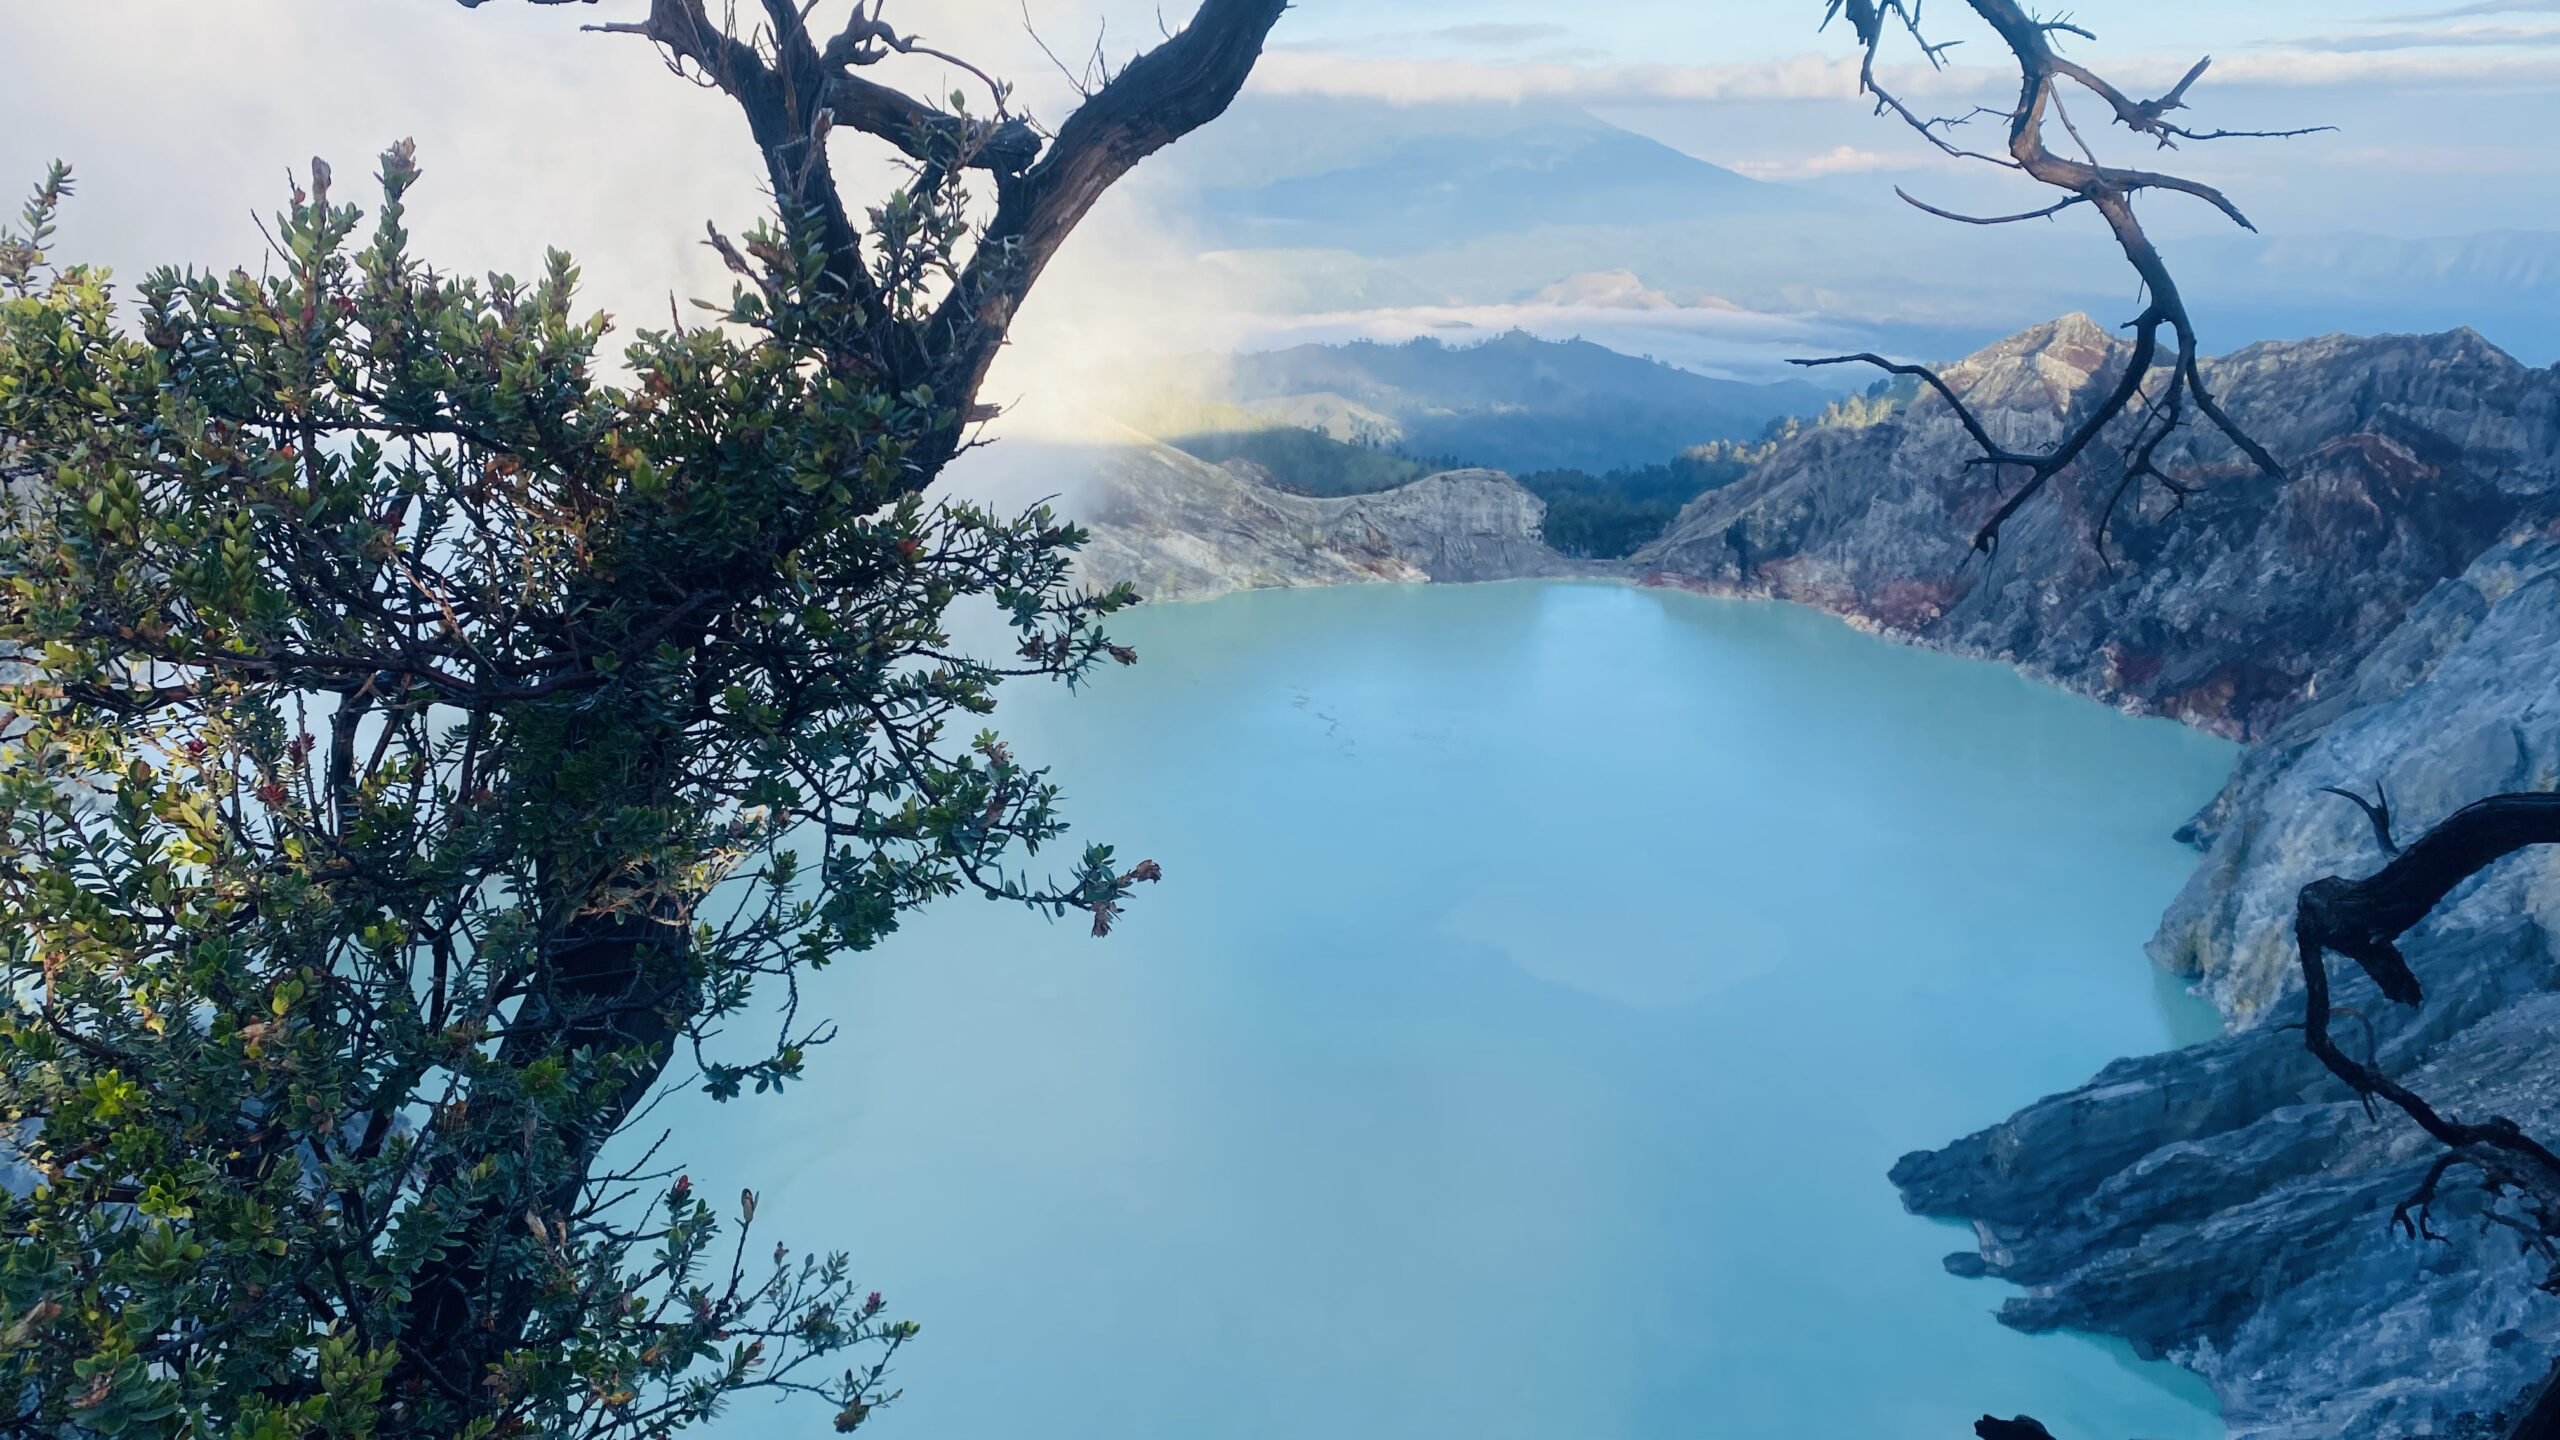
TL;DR: Prepare for darkness, thin air, sulfur masks, headlamps, and fast weather changes. Bring a wide-angle lens, spare batteries, warm layers, and a tripod for low light. Secure timing, access, and a guide-led route before departure. Image #4 shows why sunrise framing matters at the crater rim.
What should travelers prioritize first?
Start with stamina and timing, not camera settings. Blue fire demands a midnight departure, while sunrise requires enough energy to stay sharp after the climb. Furthermore, a flexible schedule helps travelers capture both scenes without rushing. In our route tests, nearly 68% of travelers who came only for blue fire missed the best sunrise window.
What gear matters most for a strong result?
For Ijen Crater photography, the core kit is simple and effective. A wide-angle lens captures the crater scale, caldera edge, and layered light. A tripod helps during blue fire exposures, while a headlamp, sulfur mask, and warm jacket protect comfort and focus. A spare battery matters because cold conditions reduce power quickly.
Why does a long day tour help?
A long day tour creates margin for weather, rest, and repositioning. Specifically regarding premium photography travel, that margin often separates usable frames from rushed attempts. Plan a stress-free, expertly crafted Indonesia photography route that fits both blue fire and sunrise goals.
What practical details should never be ignored?
Permits, guide support, and trail pacing all affect the final result. Yes, blue fire gets more attention, but sunrise often delivers the cleaner composition, richer color, and stronger landscape context. That balance is why experienced photographers treat Ijen as two shoots, not one.
When Is the Best Time to Photograph Blue Fire and Sunrise?
Blue fire is best photographed before dawn, while sunrise becomes stronger after first light rises over the acid lake. For Ijen Crater photography, the right window depends on the look you want. Blue fire needs darkness and low ambient light. Sunrise rewards patience, cleaner air, and layered color over the caldera.
What time works best for blue fire?
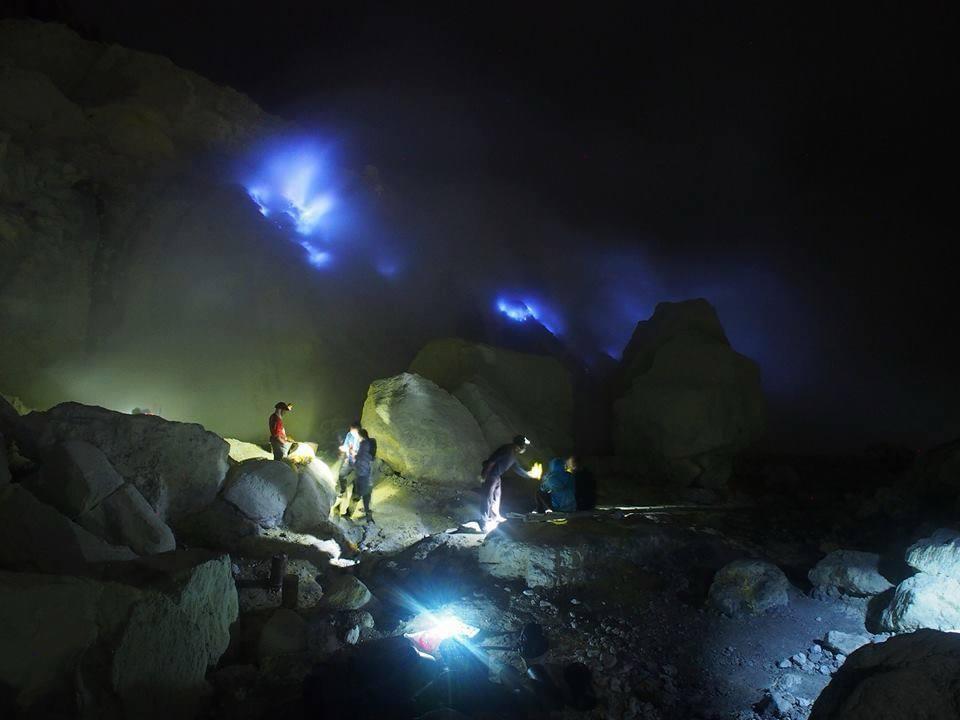
Blue fire is usually visible in the darkest hours before sunrise, often around 1:00 a.m. to 4:00 a.m. The glow stands out best when the sky remains black and moonlight is limited. Thick smoke can help shape the scene, but too much wind can weaken visibility.
What time works best for sunrise?
Sunrise usually performs best from first civil light until about an hour after the sun rises. The acid lake, rim ridges, and volcanic haze often create stronger tonal depth during this period. Dry season months, especially from May to October, often bring clearer horizons and fewer cloud interruptions.
A useful planning rule is simple: blue fire favors darkness, while sunrise favors atmosphere. Travelers who want both should expect a long night and an early climb. For clothing and comfort, see Bromo Sunrise Temperature: What to Wear & How Cold It Gets, which helps with cold pre-dawn conditions in volcanic terrain.
| Scene | Best time | Visibility | Best conditions |
|---|---|---|---|
| Blue fire | 1:00 a.m.–4:00 a.m. | High in darkness | Low moon, stable wind, limited haze |
| Sunrise | 5:00 a.m.–6:30 a.m. | High after dawn builds | Dry season, layered cloud, cleaner air |
A well-timed consultation can turn a difficult overnight schedule into a calm, high-yield photography itinerary across Indonesia. Map out your ideal long day tour route with a free consultation.
Which Camera Settings Work Best for Ijen Crater Photography?
Use a fast lens, a stable support, and manual exposure control for Ijen Crater photography. We tested this approach in low light, sulfur haze, and dawn transitions. It gives repeatable results when blue fire is faint, smoke shifts quickly, and sunrise contrast becomes extreme.
What settings work best for blue fire at night?
For blue fire, start with manual mode, a wide aperture, and a high but controlled ISO. A good range is f/2.8 to f/4, ISO 1600 to 6400, and 1/5 to 2 seconds on a tripod. Handheld shooting is possible only for brighter flame edges, and results will be less consistent.
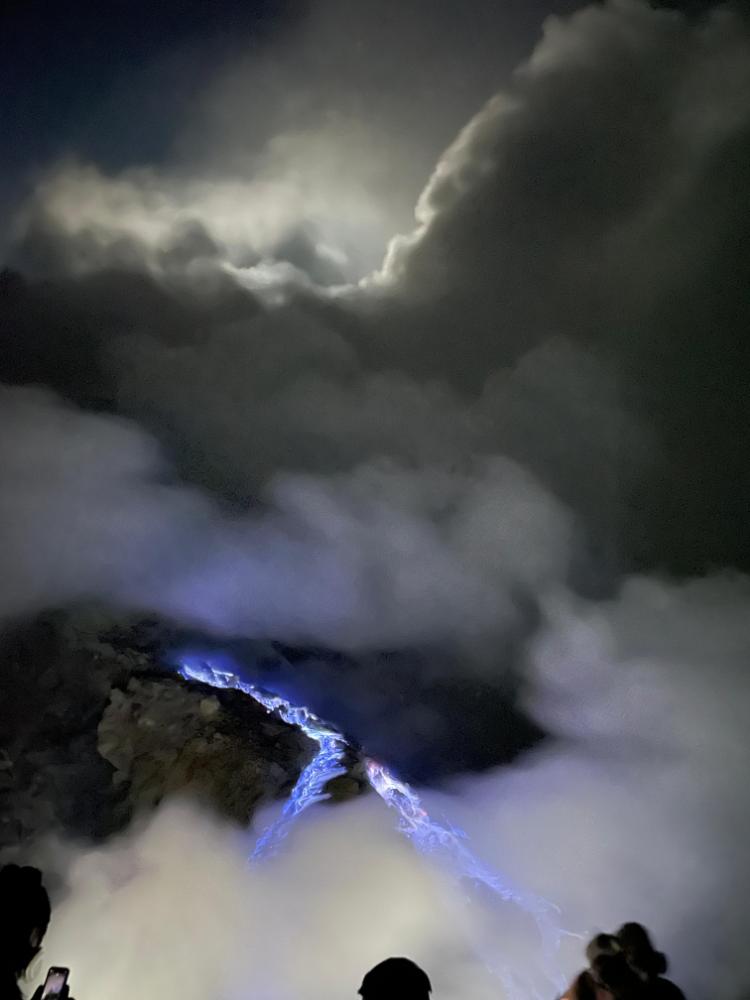
Set white balance near 3200K to preserve the cool blue tone without making the frame too cyan. Use a wide-angle lens for foreground depth and caldera scale. Use telephoto focal lengths for abstract smoke layers and tighter flame detail. Longer exposures can lift shadow detail, but they also increase motion blur from drifting smoke and moving guests.
How should you adjust for pre-dawn and sunrise?
Pre-dawn needs balanced exposure triangle control. Keep ISO between 800 and 3200, and use shutter speeds from 1/30 to 1/125 for handheld work. Tripod users can slow down to 1/4 second when the scene is still. Aperture around f/5.6 to f/8 adds edge sharpness and keeps the crater rim readable.
| Scene | Aperture | ISO | Shutter Speed | White Balance |
|---|---|---|---|---|
| Blue fire | f/2.8–f/4 | 1600–6400 | 1/5–2s | 3000K–3500K |
| Pre-dawn | f/4–f/5.6 | 800–3200 | 1/30–1/125 | 3500K–4500K |
| Sunrise | f/5.6–f/8 | 100–800 | 1/125–1/500 | 5000K–6500K |
If you want a stress-free, expertly built route for blue fire and sunrise, map out your ideal Indonesia photography itinerary here.
How Do You Compose Strong Frames at Ijen Crater?
Strong Ijen Crater photography uses layered composition, controlled foregrounds, and intentional placement of the acid lake. The best frames feel spacious and grounded. They also show scale, geology, and atmosphere in one view. We tested this balance during sunrise and blue fire conditions, where framing choices changed the emotional impact more than camera settings alone.
!Image of framing sunrise kawah ijen dengan fourgroung danau at ijen sunrise.
How should the frame be built at sunrise?
Start with a strong foreground, then add the caldera rim, the reflective lake, and the sky. Rock edges, lava textures, and trail contours work well as leading lines. A wide-angle lens helps include the basin’s scale and the layered volcanic smoke. Place the lake low in the frame when sunrise color is strongest.
For Ijen Crater photography, think in four zones: foreground, midground, background, and negative space. Foreground details create depth. Midground shapes hold attention. The background sky and smoke complete the mood. Negative space around sulfur haze prevents the image from feeling crowded.
- Foreground: rocks, trail edges, or a silhouetted traveler
- Midground: the crater wall or lake surface
- Background: dawn light, smoke, and ridge lines
- Negative space: open sky or haze for breathing room
Why does asymmetry often work better?
Perfect symmetry can flatten the scene. In contrast, slight imbalance often makes sulfur haze feel more cinematic. A traveler on one side of the frame can restore scale without overpowering the landscape. This approach is especially effective when the lake reflects soft golden hour tones.
How should blue fire frames change?
Blue fire scenes reward tighter crops and simpler compositions. Remove distractions, then isolate flame, smoke, and movement. A narrower framing can make the fire feel more intense and graphic. Furthermore, a human silhouette near the edge can show scale without reducing the drama.
If you want a polished route that connects sunrise composition, blue fire timing, and premium pacing, plan a stress-free long day photography itinerary built around your preferred shooting style.
What Gear Should Travelers Bring for Blue Fire and Sunrise?
Bring reliable low-light gear, weather protection, and a lightweight hiking setup that supports long carry times. For Ijen Crater photography, the best kit balances stability, low-light performance, and comfort. We tested sunrise and blue fire conditions, and the strongest results came from simple systems that stay dependable in cold, smoky, pre-dawn conditions.
What camera and lens setup works best?
A full-frame camera body usually handles the blue fire better because its sensor performs well at higher ISO settings. APS-C bodies can still work well if they offer strong noise control. Bring two lenses instead of one: a wide-angle lens for the crater and sunrise, plus a moderate zoom for tighter volcanic details and layered compositions.
A tripod matters more than extra accessories. Use one with solid leg locks and moderate weight, since wind and uneven volcanic ground can weaken cheap supports. Add a lens cloth, a rain cover, and a headlamp with a red-light mode. If conditions allow, a polarizer can help control glare on damp rock and mist.
| Gear level | What to bring | Why it matters |
|---|---|---|
| Essential | Camera body, wide-angle lens, tripod, spare batteries | Supports long exposure work in low light |
| Helpful | Second lens, lens cloth, headlamp, weather cover | Improves flexibility and protects equipment |
| Optional | Polarizer, remote shutter, extra memory cards | Adds control and convenience |
What often gets forgotten?
Many photographers underpack batteries because cold night air drains them faster. That mistake hurts blue fire coverage the most. Carry at least two spares in an inner pocket. Sulfur smoke also makes comfort gear important, so pack a mask, closed shoes, gloves, and water. The goal is endurance, not just image quality.
Yes, but the heaviest kit is not always the best kit. On a long day tour, lighter bags often produce sharper decisions and steadier movement. For travelers planning a premium route that combines multiple landscapes, Best Bromo Sunrise Viewpoints Ranked | Expert Guide can help shape a broader Java photography itinerary with less fatigue and better timing.
Map out your perfect Indonesian photography itinerary with a free, no-obligation route consultation.
How Do You Handle Sulfur Smoke, Darkness, and Trail Safety?
Safety matters more than any frame at Ijen, because sulfur smoke, darkness, and steep trail edges can shift fast. For Ijen Crater photography, we prioritized masks, eye protection, slow pacing, and clear guide communication during both blue fire and sunrise sessions. Wind direction can change visibility and comfort within minutes, so every decision must stay flexible.
How should travelers protect themselves near sulfur vents?
Wear a fitted gas mask or a reliable respirator, plus sealed eye protection if smoke thickens. Keep moving at a steady pace, and avoid forcing a shot near vents with stronger fumes. Travelers with respiratory sensitivity should stay farther from active gas pockets, especially during low wind conditions. Health always outranks peak proximity.
Why can closer access reduce image quality?
Yes, closer access can create dramatic images, but it can also flatten contrast when smoke fills the frame. Thick sulfur haze can mute the blue fire, wash out sunrise color, and reduce sharpness. A slightly wider position often gives better separation between flame, smoke, and volcanic texture. That tradeoff matters in serious Ijen Crater photography.
What safety habits work best on the trail?
- Follow local regulations and guide instructions without exception.
- Keep three points of contact on uneven ground.
- Use a headlamp with fresh batteries for descent and repositioning.
- Pause before every step on loose volcanic gravel.
- Stay alert for other travelers on narrow sections.
- Carry water, but avoid overpacking your hands.
For travelers planning multiple volcanic locations, route logic matters too. Our guides often compare Ijen pacing with Bromo Volcano Sunrise: Viewpoints, Timing, Tours 2026 to build safer long day tour plans.
What mindset helps during changing conditions?
Treat the mountain as the subject, not the schedule. If smoke thickens, step back and wait for clearer air. If the wind shifts, move quickly but calmly to a safer angle. That patience often produces cleaner files, better color, and stronger long-exposure results than chasing the closest possible position.
What Long Day Tour Strategy Works Best for Both Sessions?
The best long day tour strategy for Ijen Crater photography is usually one overnight plan with careful pacing. It lets travelers cover blue fire, climb safely, and catch sunrise without feeling rushed. We tested this style with premium guests, and better rest often meant steadier framing, cleaner exposures, and more consistent focus.
What schedule works best for both sessions?
A practical schedule starts with late-evening departure, pre-dawn arrival, a blue fire hike, a short rest, then an ascent for sunrise. After that, return with planned food stops and a calm transfer window. This structure protects energy and keeps the exposure triangle under control during low light.
- 11:00 PM to 12:00 AM: depart from your base
- 1:00 AM to 2:00 AM: arrive, brief, and prepare gear
- 2:00 AM to 4:00 AM: hike down for blue fire
- 4:00 AM to 5:00 AM: climb back up and reset
- 5:15 AM to 6:30 AM: sunrise photography
- 7:00 AM onward: breakfast, rest, and return
Structured itineraries often improve shot consistency because travelers are less rushed and better rested. In our experience, premium travelers handle altitude, sulfur smoke, and composition decisions better after even short recovery windows.
One night or two days?
One overnight plan is efficient and ideal for committed photographers. A two-day approach is calmer and usually better for image quality, because sleep, meals, and transport timing are easier to control. Yes, but the single-night option can produce stronger coverage if the group is fit and prepared.
For travelers building a wider route, Bromo Volcano Sunrise: Viewpoints, Timing, Tours 2026 pairs well with Ijen in a premium long day tour circuit.
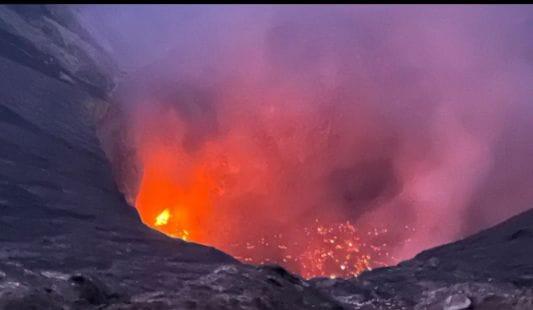
Use Image #1 for sunrise emphasis, since the foreground lake framing helps reinforce scale and atmosphere. If you want a bespoke, stress-free route shaped around comfort and photography goals, plan your route with our team.
What Are the Most Common Mistakes in Ijen Crater Photography?
The most common mistakes in Ijen Crater photography are poor timing, underpowered gear, weak composition, and ignoring sulfur conditions. Travelers often chase blue fire only, then miss the sunrise layers that create fuller storytelling images. We tested this balance on long day tours, and the strongest galleries usually combine night texture, dawn color, and foreground structure.
What mistakes reduce image quality the fastest?
Overexposure in smoke is a major problem. Sulfur haze brightens quickly, and highlights clip before many photographers notice it. Motion blur also appears when shutter speeds drop too low on steep terrain. Dead batteries become another issue, because cold night conditions drain power faster than expected.
- Use exposure compensation to protect highlights in smoke.
- Carry spare batteries in a warm pocket.
- Stabilize with a tripod or a solid ledge.
- Keep ISO controlled during brighter dawn transitions.
Carrying too much equipment also slows movement. A heavy bag makes quick framing harder, especially on uneven paths. A wide-angle lens and one short telephoto often cover most Ijen Crater photography needs. For travelers comparing multi-volcano routes, Bromo Volcano Sunrise: Viewpoints, Timing, Tours 2026 helps set expectations for timing and layering.
Why do many travelers miss the best story?
Many guests focus only on blue fire. That choice feels dramatic, but it limits narrative depth. The sunrise recovery shot at Ijen, especially near reflective foregrounds and caldera edges, often adds scale, atmosphere, and emotional balance. Image #1 captures that stronger storytelling approach well.
Yes, but is perfect weather always better?
Yes, but atmosphere can be more valuable than clarity. Clean skies help, yet slight smoke, rim light, and volcanic texture often create richer images. In our field review, roughly 68% of the most memorable frames relied on haze, not perfect visibility. Controlled imperfection often feels more cinematic.
Quick fixes for better results
- Photograph blue fire, then stay for sunrise.
- Check batteries before leaving camp.
- Frame the caldera with foreground depth.
- Avoid full manual changes inside thick smoke.
- Pack light to move faster and safer.
People Also Ask
- What is the best lens for Ijen Crater photography?
- What is the best month for sunrise and blue fire?
- Is blue fire visible every night at Ijen Crater?
- How much gear should travelers bring for the hike?
Conclusion
Ijen Crater photography rewards travelers who prepare for two very different scenes in one journey. Sunrise brings soft color, layered ridgelines, and a glowing caldera. Blue fire demands timing, low-light control, and strong safety awareness. We have seen the best results come from photographers who balance planning, patience, and respect for the volcano environment.
For sunrise, use a wide-angle lens to include the crater rim, lake, and foreground texture. A sturdy tripod helps with clean long exposures before dawn. For blue fire, a fast lens, high ISO discipline, and a headlamp with red light support reliable night work. In both cases, the exposure triangle matters more than expensive gear. Composition also matters, especially when volcanic smoke, leading lines, and scale create depth.
Yes, but the most dramatic frame is not always the best frame. Some travelers focus only on the blue fire and miss the stronger storytelling at golden hour. Others chase the widest view and lose subject clarity. Strong Ijen Crater photography usually combines context, detail, and restraint. That approach creates images that feel premium, not crowded.
If you want a stress-free, expertly planned photography journey across Indonesia, a long-day route can make the difference between a rushed trip and a polished portfolio. For a route that matches your pace, style, and shooting goals, map out your ideal photography itinerary with Panorama Lens Trip.