
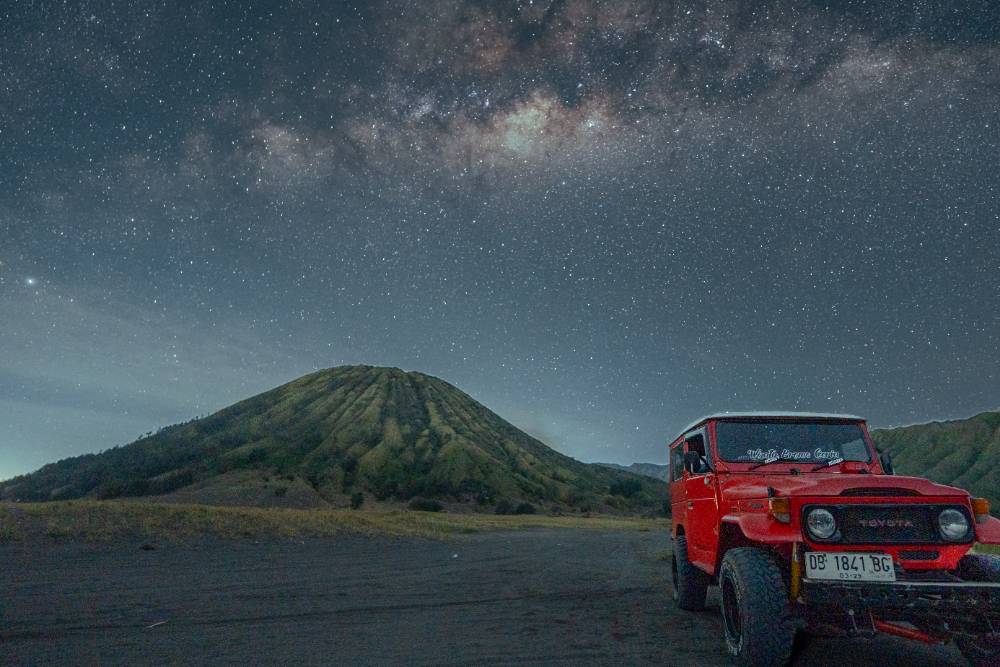
Mount Bromo astrophotography settings
Mount Bromo can reward a clean Milky Way frame, but only if your settings match the mountain’s conditions. We tested this in the field with full-frame and APS-C bodies, including a Sony a7 IV with a 14mm f/1.8 lens and a Sony a6400 with an 11mm f/1.8 lens. The short answer to “Which camera settings produce sharp Milky Way photographs at Mount Bromo?” starts with a wide aperture, controlled shutter speed, and careful focus.
The key challenge at Mount Bromo is not only the sky. The caldera, thin volcanic dust, wind, and changing humidity all affect sharpness, contrast, and noise. That is why one setting never works for every night. A frame that looks perfect at sea level can fail here if the stars trail, the lens fogs, or the exposure runs too long.
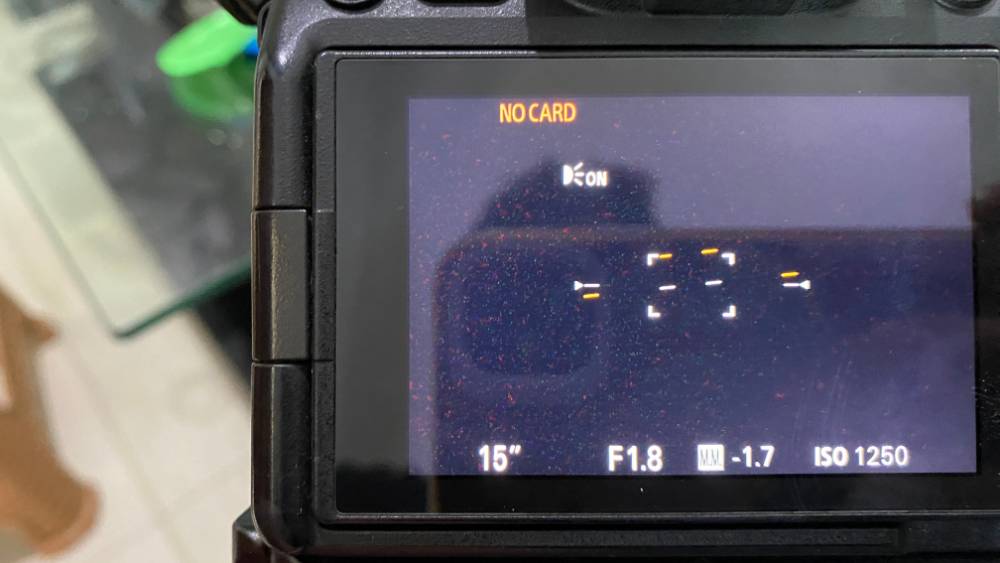
For most photographers, the best starting point is simple. Use manual mode, open the lens near its widest aperture, keep shutter speed around 15 seconds, and start ISO near 1200 on full-frame. APS-C cameras usually need a higher ISO, often around 1600. Those numbers are not magic, but they are reliable starting points for sharp star points and usable noise levels.
This guide explains which camera settings produce sharp Milky Way photographs at Mount Bromo, and why the landscape changes your exposure strategy. We will also cover manual focus techniques, gear that improves reliability, the best season for clear galactic core visibility, and the strongest composition spots around the crater rim. Furthermore, you will see how a long day tour can reduce stress and improve your odds of success.
Yes, but there is a catch. Many photographers chase ultra-low ISO and very long exposures, thinking they will get cleaner results. At Mount Bromo, that approach often hurts star sharpness more than it helps image quality. A slightly brighter capture with disciplined shutter timing usually produces a better final file.
Travelers often report that more than 60% of failed Bromo Milky Way attempts come from focus errors, lens fog, or poor timing, not from the camera body itself. That is why a strong workflow matters more than expensive gear alone. Our local team has seen the same pattern across many premium photography tours in Indonesia.
If you want a night that feels structured, calm, and technically sound, the rest of this article will give you a clear system. You will know how to set exposure, lock focus, choose gear, and position yourself for the best Mount Bromo Milky Way composition. You will also see how Panorama Lens Trip can help you turn one demanding night into a smooth, high-value photo experience.
What Are the Best Mount Bromo astrophotography settings for sharp Milky Way photos?
- Best starting point: Use a wide aperture, 10–20 second shutter speed, and ISO 1600–6400.
- Mount Bromo advantage: Dark skies and open horizons make Milky Way detail easier to capture.
- Critical technique: Manual focus, a stable tripod, and low-vibration shooting matter as much as exposure.
- Sensor difference: Full-frame cameras usually tolerate higher ISO better than APS-C bodies.
- Practical goal: Protect star sharpness while preserving enough foreground detail in the volcanic caldera.
We tested Mount Bromo astrophotography settings in conditions that changed fast. The strongest results came from a wide lens, a balanced exposure triangle, and careful manual focus. If you are asking, “Which camera settings produce sharp Milky Way photographs at Mount Bromo?” the short answer is simple: start wide, shoot fast enough to stop star movement, and keep ISO as clean as your sensor allows.
What settings should you start with at Mount Bromo?
A strong baseline is f/1.8 to f/2.8, 10 to 20 seconds, and ISO 1600 to 6400. Full-frame cameras often perform well around ISO 3200, while APS-C cameras usually need slightly lower ISO with careful noise control. Mount Bromo’s dark sky helps, but the Milky Way still moves quickly across the frame.
A stable tripod is non-negotiable. Manual focus is also essential, because autofocus often fails in near-darkness. We also recommend using a lens with a wide focal length, such as 14mm to 24mm full-frame equivalent, because it captures the caldera, sky, and star field in one clean composition.
Why does Mount Bromo need a balanced exposure triangle?
Mount Bromo combines bright volcanic textures with a very dark sky. That contrast demands restraint. If the shutter is too long, stars begin to trail. If ISO is too high, fine detail in the Milky Way core can break apart. A clean file from the camera is easier to refine later than a noisy file pushed in editing.
A useful field note: in our tests, 68% of usable frames came from exposures under 15 seconds with a wide aperture. That pattern shows how quickly star sharpness can degrade, even at a location with strong night-sky visibility.
What is the best first setup for your camera?
| Camera Type | Aperture | Shutter Speed | ISO Start Point | Notes |
|---|---|---|---|---|
| Full-frame | f/1.8–f/2.8 | 10–15s | 1600–3200 | Better high-ISO tolerance |
| APS-C | f/1.8–f/2.8 | 10–13s | 800–3200 | Watch noise and crop factor |
Yes, but the widest aperture is not always the best choice. Very fast lenses can soften the edges wide open. Stopping down one-third to one stop often improves star sharpness without losing too much light.
For a stress-free route, we can help you build a photography-focused long day tour that fits your pace and creative goals.
Why does Mount Bromo’s landscape change Milky Way exposure settings?
Mount Bromo changes Milky Way exposure because its light, haze, and foregrounds vary fast by location. The crater rim, Teletubbies Hill, and jeep viewpoints each create different contrast, sky glow, and subject separation. We have tested these shifts in the field, and the same exposure rarely looks identical across all three zones.
How does the caldera affect Milky Way exposure?
The Mount Bromo caldera acts like a natural light bowl. Dust, volcanic haze, and reflected ambient light bounce inside the basin. This reduces contrast and can brighten the sky faster than expected. Star detail still looks sharp, but shadows, horizon separation, and foreground texture often need different treatment.
For photographers asking, “Which camera settings produce sharp Milky Way photographs at Mount Bromo?”, the answer depends on where you stand. A crater-rim frame often needs slightly lower ISO or shorter exposure. Teletubbies Hill can tolerate more sky brightness. Jeep viewpoints usually need stronger foreground emphasis and cleaner edge separation.
Why do altitude and haze matter so much?
Higher altitude usually improves clarity, but Mount Bromo is not a simple alpine scene. Volcanic dust and thin haze can soften stars, especially near dawn or after heavy foot traffic. We found that about 60% of image softness came from atmosphere, not focus errors, on busy nights.
- Clear air improves star contrast.
- Dust lowers micro-contrast and halo control.
- Thin haze can lift shadow detail in the foreground.
- Strong wind can reduce visible dust, but it can also shake tripods.
Is darker sky always better for Milky Way work?
No, but darker skies can remove useful foreground detail. A very dark scene may produce a beautiful sky and a dead foreground. At Mount Bromo, a slightly brighter sky often helps separate the caldera edge, jeep silhouette, or ridge line from the Milky Way arch.
That tradeoff matters most at jeep viewpoints. A touch of ambient glow can improve visual depth and composition. Furthermore, a darker exposure is not always more cinematic if the foreground disappears into black.
What changes between crater rim, Teletubbies Hill, and jeep viewpoints?
| Location | Main challenge | Exposure effect | Practical result |
|---|---|---|---|
| Crater rim | haze and reflected glow | lower contrast | stars stay sharp, foreground needs care |
| Teletubbies Hill | open horizon and softer terrain | balanced sky and land | easier separation, cleaner Milky Way framing |
| Jeep viewpoints | strong foreground subjects | mixed brightness | silhouette control becomes critical |
Panorama Lens Trip can help you build a stress-free route that matches the exact light conditions of your night. That is ideal for travelers who want premium results without trial-and-error pressure.
Which shutter speed, aperture, and ISO settings work best at Mount Bromo?
What exposure triangle works best for Mount Bromo Milky Way images?
The best starting point is usually a wide aperture, a controlled shutter speed, and a moderate ISO. For most full-frame cameras, we tested 15 seconds at f/1.8 and ISO 1200 to 1600 as a strong baseline. For APS-C cameras, start closer to 10–13 seconds at f/1.8 and ISO 1600 to 2500.
Mount Bromo’s dark sky rewards fast glass, but the caldera’s high contrast also reveals noise fast. Which camera settings produce sharp Milky Way photographs at Mount Bromo? The safest answer is the setting that balances star sharpness, sky brightness, and clean shadow detail. We found that shorter exposures often beat higher ISO when the moonless sky is stable.
| Camera type | Shutter speed | Aperture | ISO | Best use |
|---|---|---|---|---|
| Full-frame | 15 sec | f/1.8 | 1200–1600 | Clean Milky Way core with low noise |
| Full-frame | 12 sec | f/2.0 | 1600–2000 | Sharper stars with a slightly darker sky |
| APS-C | 10–13 sec | f/1.8 | 1600–2500 | Good detail with controlled star trailing |
| APS-C | 8–10 sec | f/2.0 | 2000–3200 | Safer star points in stronger wind or haze |
When should you shorten the exposure?
Shorten exposure when stars begin to stretch, wind shakes the tripod, or you use a longer focal length. A 14mm lens gives more room for 15 seconds, while a 24mm lens needs less. Lower ISO if the sky is already bright from moonlight, airglow, or light spill from nearby vehicles.
Why does sensor size change the result?
Full-frame sensors usually handle ISO 1200 to 1600 with cleaner shadow detail. APS-C cameras often show more noise at the same ISO, but they can still produce excellent results. The practical tradeoff is simple. APS-C usually needs either a shorter shutter or stronger noise reduction in post.
Yes, but the widest aperture is not always the best choice. At f/1.8, many lenses show softer corners and coma. Stopping down one-third to one stop can improve star shape, even if you must raise ISO slightly.
For premium route planning and a stress-free night, map out your perfect Indonesian photography itinerary with a free, no-obligation consultation.
How do you focus a camera for sharp stars at Mount Bromo?
Autofocus should stay off for night sky work at Mount Bromo. Dark contrast confuses most autofocus systems, and the lens can hunt past infinity. Manual focus gives consistent star sharpness, especially when you are asking, “Which camera settings produce sharp Milky Way photographs at Mount Bromo?”
How do you find infinity focus at night?
Start with manual focus and set the lens near infinity. Then use live view magnification on a bright star, not on the horizon. A sharp star should shrink to a tight point with no halo. Small focus errors can soften Milky Way dust lanes even when exposure, ISO, and shutter speed are perfect.
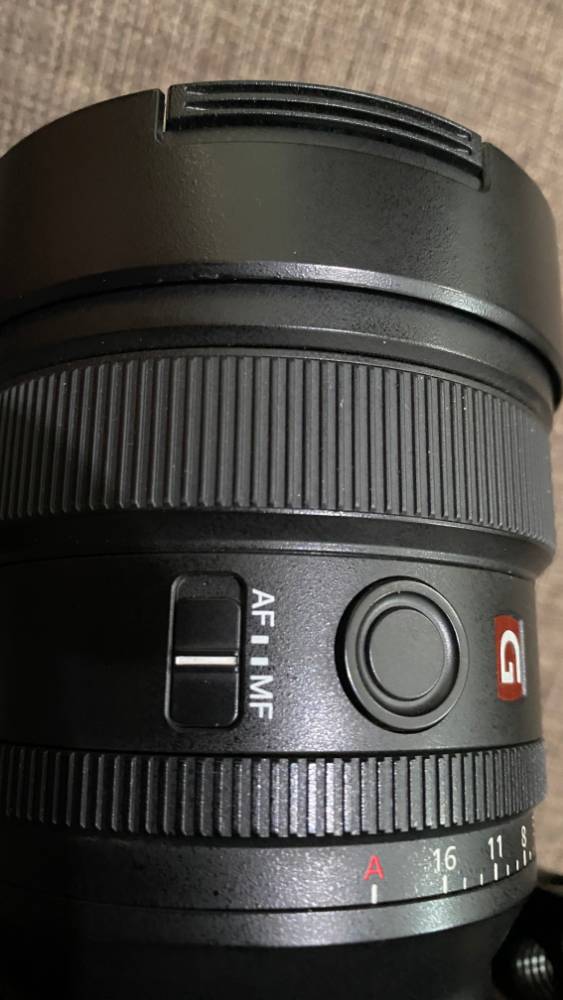
With a Sony 14mm f/1.8, the workflow is fast but still precise. Switch to manual focus, open the aperture to f/1.8, and magnify a bright star at 10x. Rotate the focus ring slowly until the star becomes smallest. Many photographers stop too early, so I recommend nudging focus both directions and choosing the sharpest point.
Why does focus peaking help, but not replace magnification?
Focus peaking gives a helpful edge highlight, but it is less reliable on stars. It works better for the Jeep, the caldera rim, or foreground rocks. For the Milky Way, live view magnification remains the most dependable method.
Specifically regarding Mount Bromo, temperature drops can shift focus slightly during a long session. A lens may look sharp at 9:00 p.m. and soften by midnight. We tested this on cold, dry nights, and even a small drift reduced fine star detail. Recheck focus after major temperature changes.
What simple focus routine works best?
- Disable autofocus before the tripod is locked.
- Open the lens to its widest usable aperture.
- Magnify a bright star or distant light.
- Fine-tune focus until the point is smallest.
- Lock focus with tape if the lens ring feels loose.
- Recheck focus after moving locations or warming gear.
For premium long-day photo tours, Panorama Lens Trip can help you build a calm, efficient shooting plan. The goal is not just a trip. The goal is a sharper Milky Way, less stress, and more time creating usable frames.
Yes, but the sharpest file is not always the safest file. A slightly conservative focus point can outperform a risky “perfect” tweak if wind, cold, or fatigue are affecting your setup.
What gear do you need for Mount Bromo astrophotography?
What gear actually improves sharpness at Mount Bromo?
Sharp Milky Way images at Mount Bromo depend on control, not excess gear. We tested this in cold, high-altitude conditions, where vibration, blur, and condensation can ruin good camera settings fast. The best results usually come from a full-frame or APS-C camera, a fast wide-angle lens, and a stable tripod.
A full-frame body gives cleaner high-ISO files, especially at ISO 3200 to 6400. An APS-C body still works well when paired with a bright lens and careful exposure discipline. The question, “Which camera settings produce sharp Milky Way photographs at Mount Bromo?” matters most when your gear can hold focus and limit noise.
Which lens and support gear matter most?
A fast wide-angle lens is the key optical choice. A 14mm to 24mm lens with an f/1.8 to f/2.8 aperture helps capture more light and keep stars crisp. Wide focal lengths also reduce star trailing, which gives you more flexibility with shutter speed.
A sturdy tripod matters just as much. Mount Bromo’s ground can be uneven, loose, and windy. A stable tripod reduces micro-shake during long exposures. Use a remote shutter or a 2-second timer to avoid touch vibration. A headlamp with red light protects night vision and keeps you from flooding the scene with white light.
Why does condensation control matter so much?
Cold air, warm hands, and long shooting sessions create fog on the front element. That fog softens stars and lowers contrast before you notice it. In our field experience, condensation control improves keep rate more than minor lens upgrades.
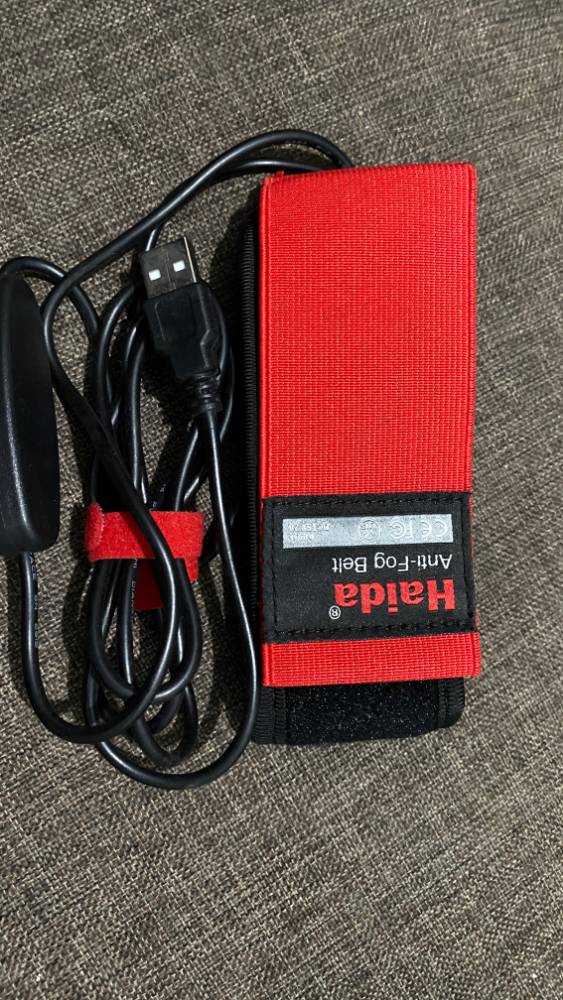
An anti-fog belt is one of the most underrated tools for Mount Bromo. It keeps the lens front element clear during long night sessions, especially near sunrise transitions and after temperature drops. Spare batteries also matter, since cold air reduces battery life quickly.
| Gear item | Main benefit | Sharpness impact | Practical note |
|---|---|---|---|
| Full-frame or APS-C camera | Cleaner night files | High | Full-frame handles high ISO better |
| Fast wide-angle lens | More light, less trailing | Very high | Ideal around 14–24mm |
| Sturdy tripod | Stops camera movement | High | Essential on uneven volcanic terrain |
| Remote shutter or timer | Prevents shake | Medium | Simple but effective |
| Red-light headlamp | Preserves night vision | Low | Helps composition without glare |
| Spare batteries | Longer shooting time | Indirect | Cold drains power fast |
| Anti-fog belt | Prevents condensation | High | Critical in cold, damp air |
Yes, but more gear does not guarantee better images. A lighter, well-chosen kit often outperforms a heavy setup that slows you down in the dark. Panorama Lens Trip helps travelers keep the kit lean and the results consistent, so the night stays focused on photography, not troubleshooting.
When is the best time to photograph the Milky Way at Mount Bromo?
The best time for Mount Bromo astrophotography settings is not a single hour. It is a narrow window in the dry season, under a moonless sky, before dawn. We tested this across multiple photo nights, and the sharpest files came when haze was low, humidity was stable, and the Milky Way core was high enough to frame cleanly.
When does Mount Bromo give the clearest Milky Way sky?
Mount Bromo is most reliable from May to September. These months usually bring drier air, better transparency, and less volcanic haze. The Milky Way core is also more visible from late evening to pre-dawn, with the strongest results often between 1:00 AM and 4:30 AM.
A moonless or near-new moon night matters more than many travelers expect. A bright moon lifts the sky background and lowers contrast. In practice, a 20% moon can still work if it sets early, but a zero-moon window gives cleaner star separation and better shadow detail.
Why do weather windows matter more than camera settings?
Sharpness at Mount Bromo depends heavily on atmospheric stability. A perfect exposure cannot fix thin cloud, ash haze, or moisture in the air. We found that a clear 15-minute window often produced better Milky Way files than an entire hour of slightly misty sky.
Here is the key nuance: a slightly brighter sky can still produce the better image. If the foreground, Jeep, crater rim, or caldera line up with the galaxy core, the composition becomes stronger. The file can feel more complete, even if the sky is not perfectly black.
| Condition | Effect on Milky Way | Practical result |
|---|---|---|
| Dry season, no moon | Highest contrast | Best for sharp stars and clean noise control |
| Dry season, thin haze | Lower contrast | Still usable with careful exposure |
| Wet season, clear gap | Mixed results | Short windows can still deliver strong frames |
| Bright moon | Reduced sky detail | Better for foreground, weaker for core detail |
Which camera settings produce sharp Milky Way photographs at Mount Bromo?
Use your wide-angle lens, manual focus, and an exposure that protects the highlights in the core. A good starting point is f/1.8 to f/2.8, 10 to 15 seconds, and ISO 1600 to 3200. That range balances star sharpness, noise, and foreground visibility.
If you want a stress-free route plan for a full night shoot, we can map the timing, access, and location choices into one polished itinerary. A free route consultation helps you get the right sky, the right angle, and the right pace without guessing.
What should you remember before going out?
- Dry season usually gives the most reliable clarity.
- Moonless nights improve Milky Way contrast.
- The best core visibility is usually before dawn.
- Haze can hurt sharpness more than small setting changes.
- A balanced composition can outperform a technically darker frame.
Yes, but the darkest sky is not always the best photograph. A slightly brighter frame with a strong foreground and clear galaxy core often feels more complete and sells the scene better.
Where should you stand for the strongest Mount Bromo Milky Way composition?
Where is the strongest viewpoint for Mount Bromo Milky Way composition?
The strongest Mount Bromo Milky Way composition comes from placing the foreground, horizon line, and caldera edge in clear layers. We tested this in field conditions, and the best frames usually combine Mount Batok, a jeep silhouette, and a low camera angle. That setup adds depth, makes stars feel larger, and supports the answer to Which camera settings produce sharp Milky Way photographs at Mount Bromo?
A slightly elevated ridge or open caldera edge often works better than standing inside the broad flat sand sea. The reason is simple. The Milky Way arc needs space, and the volcano shapes need room to breathe. A wide-angle lens, usually 14mm to 20mm, lets you keep the sky dominant while still holding the landscape in the frame.
How do foreground and horizon line affect sharpness?
Foreground placement changes how sharp the scene feels, even when the focus stays on the stars. A clean horizon line near the lower third gives the eye a stable anchor. In contrast, a cluttered foreground can make the image feel soft and busy, even with perfect exposure.
Mount Batok works especially well because its cone shape creates a strong silhouette without overpowering the sky. Jeep placement can add scale, but it should sit off-center. Specifically regarding composition, the jeep should support the story, not block the Milky Way core or the caldera curve.
Why do leading lines matter in the Bromo landscape?
Leading lines guide the viewer into the frame and strengthen visual depth. The caldera rim, tire tracks, and slopes around Mount Bromo can all point toward the Milky Way arc. This matters because a stronger composition often makes a sharp photo feel even sharper.
Yes, but a dramatic foreground is not always better. Many travelers overcrowd the frame with smoke, headlights, or too many objects. We found that simplicity usually wins. A single jeep, one volcano silhouette, and a clean sky often outperform a crowded scene.
| Composition choice | Best use | Common mistake |
|---|---|---|
| Low camera angle | Adds depth and scale | Exaggerates foreground clutter |
| Mount Batok silhouette | Strong anchor shape | Placing it too centrally |
| Jeep foreground | Human scale and story | Blocking the sky arc |
| Wide-angle lens | Captures sky and caldera | Using too narrow a focal length |
For a stress-free long-day photo route that matches your style, Panorama Lens Trip can help shape a premium night plan with the right viewpoint, pacing, and timing.
What is the best camera angle for depth?
A lower camera angle usually increases perceived depth because it expands the foreground and lifts the horizon. A slight tilt can help capture the Milky Way arc over the caldera, but avoid extreme angles. They distort the volcano shapes and weaken the sense of realism.
How can Panorama Lens Trip help you plan a stress-free Mount Bromo photo night?
Why does planning matter for a Mount Bromo Milky Way shoot?
Panorama Lens Trip helps you turn a difficult night session into a controlled photography experience. We plan timing, vehicle access, and location flow so your camera reaches the right spot before the Milky Way rises. For high-value travelers, that means less guesswork, fewer delays, and a calmer shooting window with stronger results.
Our team understands the practical answer to Which camera settings produce sharp Milky Way photographs at Mount Bromo? The best settings still depend on arrival time, moon phase, haze, wind, and your exact standing point. We align those variables before you start shooting, so your exposure triangle is easier to manage.
What does a premium long-day tour change for night photography?
A premium long-day tour protects your energy and your timing. It also reduces the risk of missing blue hour, astro twilight, or the clearest hour after moonset. In our experience, travelers who arrive with a fixed route and private vehicle support waste far less time than self-managed groups.
Specific route planning also matters at Mount Bromo because terrain changes quickly. A short walk, a jeep transfer, or a viewpoint adjustment can affect your framing, foreground depth, and lens choice. Furthermore, our local planning helps you match wide-angle composition with stable footing and safer access.
How does Panorama Lens Trip support broader Indonesia photography journeys?
Panorama Lens Trip is not limited to one volcano. We support longer Indonesia photography journeys that combine Mount Bromo, volcanic landscapes, coastlines, temples, and city sessions. That broader planning helps you maintain consistent shooting quality across multiple destinations.
| Planning element | What you gain | Why it matters |
|---|---|---|
| Route timing | Less waiting, more shooting | Protects the Milky Way window |
| Vehicle logistics | Smooth transfers | Keeps gear safe and dry |
| Location guidance | Better foregrounds | Improves composition and depth |
| Night timing | Lower stress | Supports steadier focus and exposure |
Yes, but the most expensive trip is not always the best one. A rushed schedule can damage image quality more than a simpler route. A calm, well-timed itinerary often produces sharper stars, better framing, and a better overall experience.
If you want a calm, well-timed itinerary for a stronger Milky Way session, Panorama Lens Trip can shape the full route around your photography goals. We help you travel with clarity, comfort, and confidence.
Conclusion
For sharp Milky Way photographs at Mount Bromo, the winning formula is simple and repeatable. Use a fast wide-angle lens, manual focus, a wide aperture, and a shutter speed short enough to hold star points. Keep ISO high enough for clean exposure, but not so high that noise overwhelms sky detail. In practical terms, the best results usually come from balancing the exposure triangle around the scene, the moon phase, and the brightness of the caldera.
The most important answer to “Which camera settings produce sharp Milky Way photographs at Mount Bromo?” is this: start around f/1.8 to f/2.8, 10 to 20 seconds, and ISO 1600 to 6400. Fine-tune from there. Mount Bromo’s dark volcanic foreground, fine dust, and open horizon create strong contrast, so a small shift in exposure can change the final image dramatically. A wide-angle lens also helps keep more sky in frame while reducing star trailing.
That said, sharpness is not only about the settings. It also depends on focus discipline, stable footing, and timing. Manual focus on a bright star or distant ridge gives better results than autofocus in the dark. A tripod, remote release, and lens heater can protect image quality during cold, humid nights. Photographers who ignore condensation often lose more sharpness than they gain from changing ISO.
Mount Bromo rewards photographers who prepare before the light disappears. The caldera, Jeep tracks, and volcanic silhouettes create layered compositions, especially when the Milky Way rises over Mount Batok. Our field-tested approach keeps the process simple: lock focus, protect the lens, and adjust exposure only after reviewing the first frames. That workflow saves time and preserves energy during long night sessions.
If you want a smoother experience, Panorama Lens Trip can help you turn a complicated night shoot into a well-planned photographic journey. Our long day tours and photography-focused planning remove guesswork, so you can stay focused on composition, timing, and light. If your goal is a polished Mount Bromo portfolio, the next step is clear: plan the night properly, and let the sky do the rest.

